はじめに
このブログは移行過程を記録したもので、参考価値が低いです。下記のプロジェクトを直接ご覧いただき、dockerを使用して素早くデプロイすることをお勧めします。
実行結果:
| Light | Dark |
|---|---|
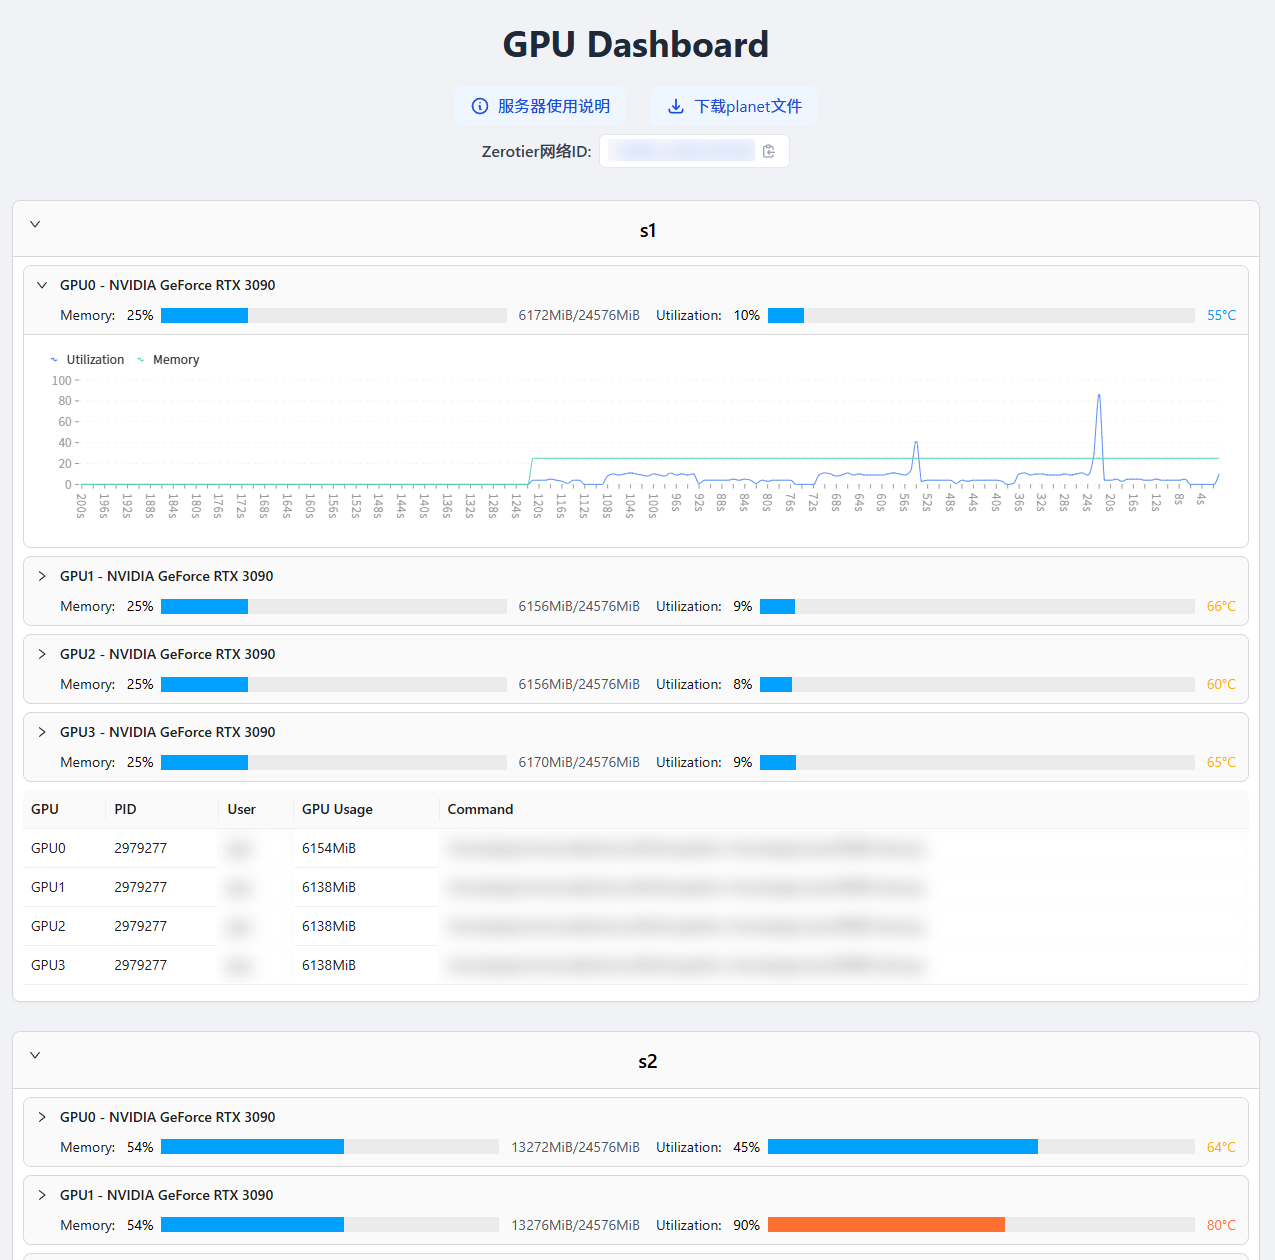 | 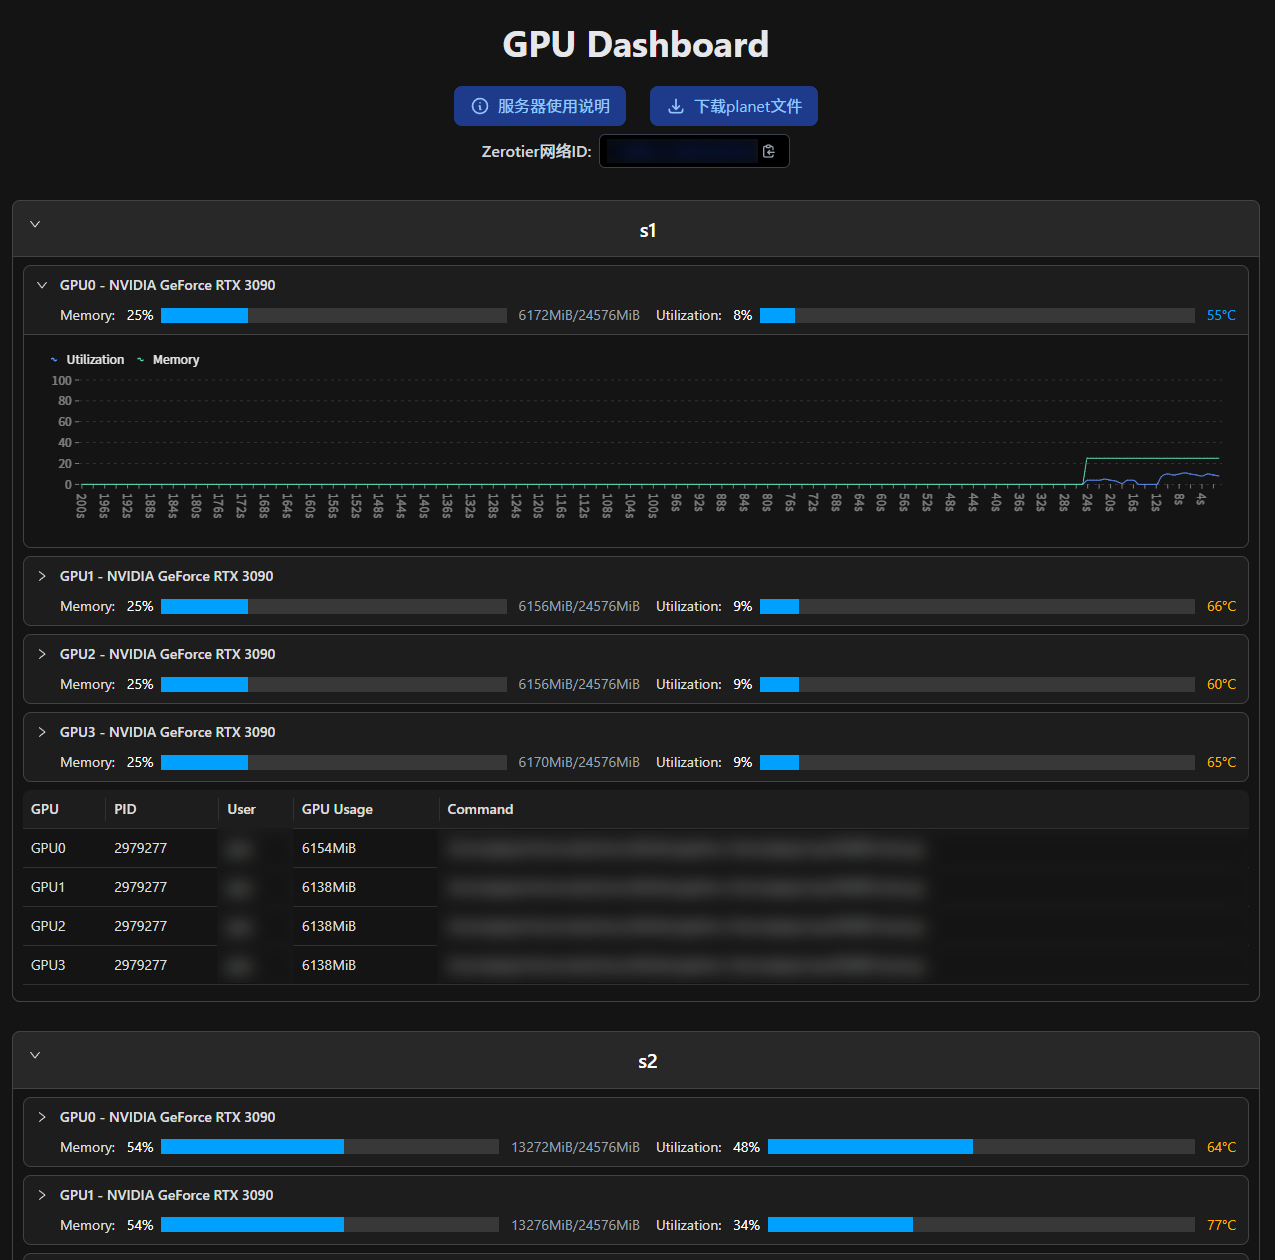 |
旧方式:sshでnvidia-smi出力を取得
以前のフロントエンド経験はPythonでhtmlを生成することにとどまっていたため、自分の小型サーバーを使ってGPU監視ソリューションを構築しました:
- sshコマンドでnvidia-smiの出力を取得し、ビデオメモリの使用量などの情報をそこから解析する。
- GPUを使用しているプロセスのpidに基づいて、psコマンドでユーザーとコマンドを取得する。
- Pythonを使って上記の情報をmarkdownとして出力し、Markdownを通じてhtmlに出力する。
- cronを設定して毎分上記の手順を実行し、nginxでウェブページのrootをhtmlがあるディレクトリに設定する。
対応するコードは以下の通りです:
CodeBlock Loading...
CodeBlock Loading...
CodeBlock Loading...
この方式にはいくつか明らかな欠点があり、更新頻度が低く、バックエンドの更新に完全に依存しているため、誰もアクセスしなくても常にデータを更新し続ける必要があります。
新方式:フロントエンドとバックエンドの分離
実はずっと、フロントエンドとバックエンドが分離されたGPU監視を実現したいと思っていました。各サーバーでfastapiを実行し、リクエストがあった時に必要なデータを返す仕組みです。最近開発した南哪充电で、フロントエンドを開発する自信がつき、apiからデータを取得してページにレンダリングするようになりました。
fastapiバックエンド
最近偶然nvitopがPythonからの呼び出しに対応していることを発見しました。ずっとコマンドでデータを可視化するしかできないと思っていました。 これは良いことです。これで必要なデータをより便利に取得できるようになり、コード量も大幅に削減されました! ( •̀ ω •́ )✧
ただし、面倒な問題があります。研究室のサーバーはルーターの下にあり、そのルーターは私の管理下になく、ポートはsshしか転送されていません。ここではfrpを使用することにし、各サーバーのAPIポートを学内の小型サーバーにマッピングしました。ちょうど私の小型サーバーには多くのwebサービスが設定されているので、ドメイン名でAPIにアクセスするのも便利です。
以前は愚かでした。実はssh(ssh -fN -L 8000:localhost:8000 user@ip)を使ってポートマッピングを行えば十分で、これでコードからfrp関連の内容を削除でき、dockerでweb側を起動するのもより簡単になります。
CodeBlock Loading...
コードには3つの環境変数があります:
SUBURL: apiのパスを設定するために使用します。例えば、サーバー名などを指定します。FRP_PATH: frpとその設定があるパスで、APIがあるポートを学内の小型サーバーにマッピングするために使用します。もしサーバーに直接アクセスできる場合は、関連する関数を削除し、最後の行を0.0.0.0に変更すれば、IP(または各サーバーに別途ドメイン名を設定)でアクセスできます。PORT: APIがあるポート。
ここでは2つのインターフェースしか書いていません 、実際にも1つしか使っていません
/count: GPUがいくつあるかを返します。/status: 具体的なステータス情報を返します。返されるデータは以下の例をご覧ください。ただし、ここではさらに2つのオプションパラメータを書いています:idx: カンマで区切られた数字で、指定したGPUのステータスを取得できます。process: 返されるプロセスをフィルタリングするために使用します。私は使用時にCに設定し、計算タスクのみを表示しています。
CodeBlock Loading...
vueで実装したフロントエンド
ここではまず手抜きをします 、実はやり方がわからないからですが、とりあえず元々Pythonで生成していたUIをそのままコピーしました。
CodeBlock Loading...
CodeBlock Loading...
CodeBlock Loading...
CodeBlock Loading...
npm run buildで無事にリリースファイルを取得し、nginxのrootをそのフォルダに設定すれば完了です。
実現した効果: https://nvtop.njucite.cn/
UIは相変わらず醜いですが、少なくとも動的に更新できるようになりました、やった!
新しいUI
まずは計画だけ立てておいて、学んでから戻ってきます。( ̄_, ̄ )
より美しいUI(これが達成されたかどうかも確信がありません、私はデザインの無能者です) 利用率の折れ線グラフを追加 ダークモード対応
2024/12/27:nextjsを使って上記のTODOをすべて完了しました。さらに、一部のホストを非表示にする機能を実装し、非表示ホストをcookieとして設定することで、次回開いた時に同じ状態が表示されるようにしました。
2025/03/11:nextjsでメールログイン機能を更新し、許可されたユーザーのみアクセス可能にしました。
2025/09/18:コードを整理しました。現在、機能は基本的に完成しており、他の人が直接デプロイしやすくなりました。
完全なコードは以下をご覧ください: